Passport Photo Rejected? Common Reasons and What to Fix
Fix the usual US passport photo rejections: head size, shadows, pose, glasses, background and image quality. Retake the source instead of over-editing.
A passport photo can be rejected even when the person is easy to recognize. The issuing authority also checks dimensions, head position, background, lighting and whether the image looks natural and unedited.
The fastest fix is usually a new source photo. Cropping or smoothing a weak frame often adds new artifacts without solving the original problem.
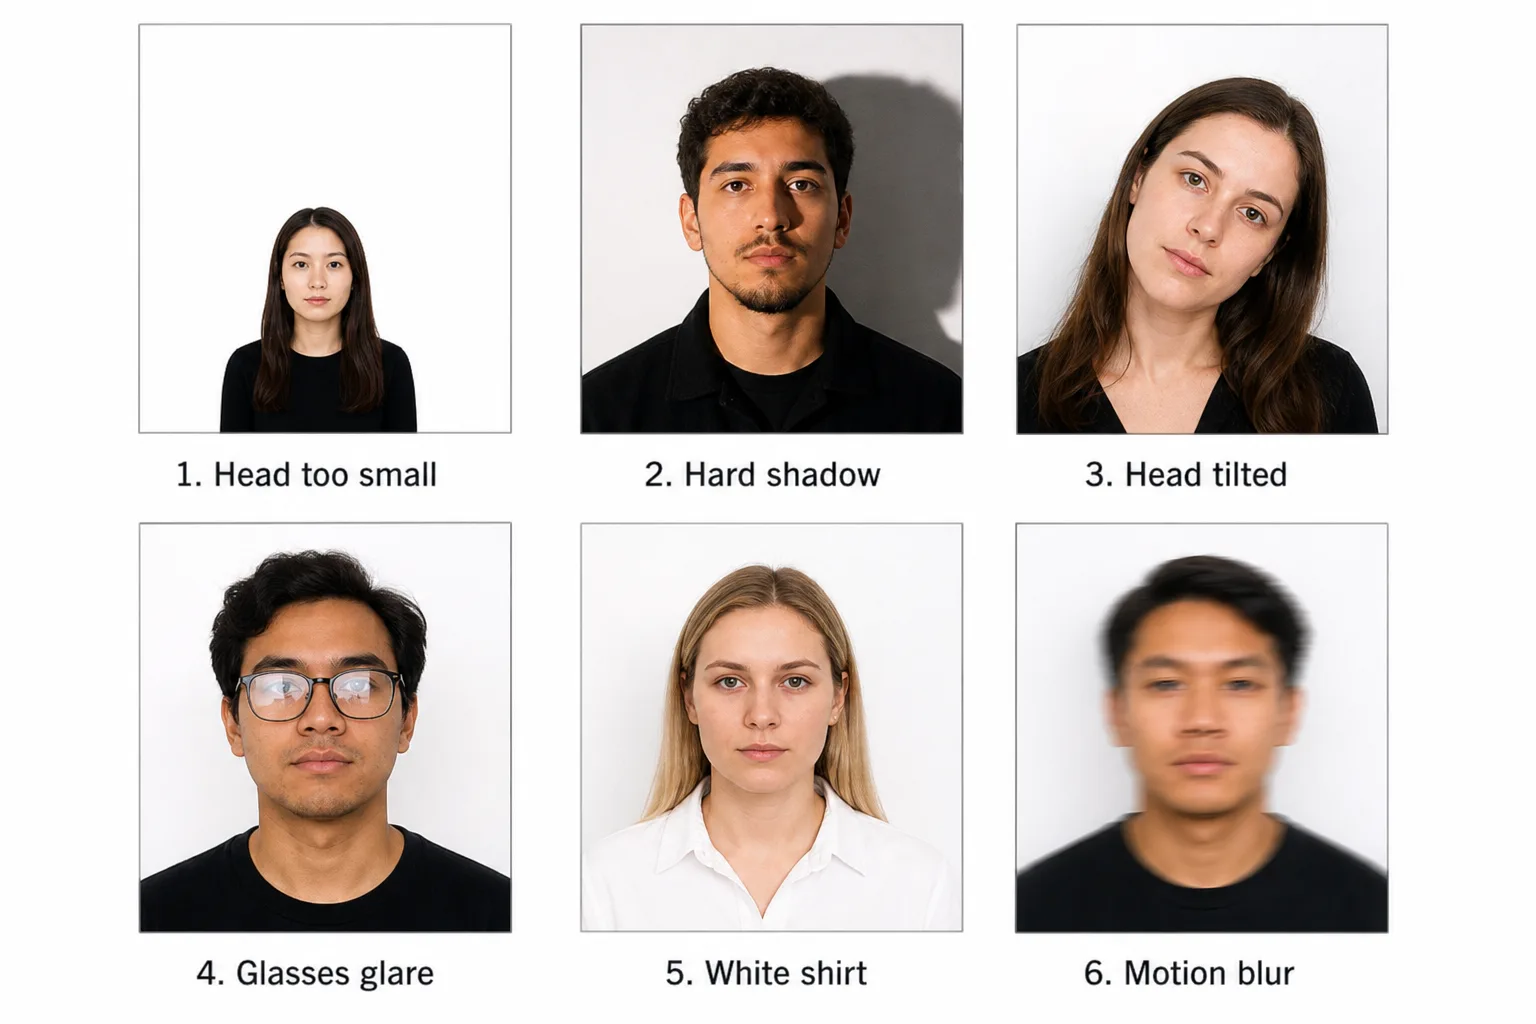
These examples are illustrations of typical source problems. They are not photos that an issuing authority has reviewed.
1. The head is the wrong size
A tight crop can cut into the hair or chin. A loose crop can leave the face too small. For a US passport photo, the finished image is 2 × 2 inches (51 × 51 mm). The Department of State says the head should measure 1 to 1 3/8 inches from the bottom of the chin to the top of the head.
What to do: start with an uncropped photo that includes the full head and shoulders. Use the US passport photo preset instead of guessing the crop.
2. Shadows appear on the face or background
A nearby lamp, direct flash or overhead light can throw a hard shadow. Replacing the background does not repair uneven light across the face itself.
What to do: face a window or another broad light. Keep the camera between the subject and the light without blocking it. Check both sides of the face before you shoot. The iPhone setup guide shows camera height and lighting.
3. The face is turned, tilted or partly hidden
Passport photos need a front-facing view. Hair across the eyes, a raised chin or a camera above or below eye level can fail pose checks.
What to do: put the camera at eye level, look into the lens and keep the head upright. Move hair away from the face and take several frames.
4. Glasses or glare hide the eyes
Glasses are not allowed in a US passport photo except for a rare documented medical exception. Even where another authority discusses clear lenses, reflections can still hide the eyes.
What to do: take the glasses off before you shoot. Do not erase frames or glare in an editor. Details: can you wear glasses.
5. The background is not acceptable
Patterns, objects, strong color or a head-shaped shadow can fail review. A US photo needs a plain white or off-white background. A very light shirt makes that background worse because the shoulders disappear; see what to wear.
What to do: stand a step away from the wall, or take a clear source that can be separated cleanly. After processing, inspect the hair edges at full size.
6. The image is blurry, compressed or heavily edited
Screenshots and images pulled from chat apps lose detail. Beauty filters, portrait blur and face reshaping can make the photo look altered. Expression problems are a separate check: can you smile.
What to do: upload the original camera file. Use a sharp frame with natural skin texture.
Before you resubmit
- Confirm the country and document type. US, UK and Indian presets are not interchangeable.
- Compare the final size and background with the live official page.
- Inspect the eyes, jawline and hair edges at full size.
- Retake the source instead of forcing a poor image to fit.
- Keep the original file until the application is accepted.
Fogkits can flag some visible pose issues, replace the background and crop to a preset. It cannot guarantee acceptance. Start with the passport photo requirements checklist, then open the page for your country.
Official sources
Last checked 10 September 2026.